






The size of an advent calendar box comes from three numbers: the largest product going behind a door, the number of days, and the grid those days are arranged in. Once you have them, the outer dimensions are simple arithmetic. This planner covers the measuring, the grid choice and the footprint math, so that when you ask for a quote on custom advent calendar boxes you already know roughly what will land on the shelf.
Start with the products, not the box
Lay out everything that goes into the calendar and measure each item in its retail pack: width, height and depth. Then find the largest figure in each direction across the whole set. Those three numbers set the cavity, because every door in a uniform grid is the same size and the biggest item has to fit behind one of them.
Add clearance. About 1/8 inch on each side is enough for a carton or jar to slide out without the customer digging at it. Soft items such as sachets, tea bags and socks need less. A round item wants a square cavity as wide as its diameter plus that clearance.
If one or two items are far bigger than the rest, do not size all 24 cavities around them. Plan two or three cavity sizes instead, which is covered further down.
Pick a grid
| Days | Grid, columns x rows | Shape | Where it works |
|---|---|---|---|
| 12 | 4 x 3 | Compact landscape | Candles, jars and minis that need a bigger cavity |
| 12 | 6 x 2 | Long and low | Mantelpiece gifting and shelf-edge display |
| 24 | 6 x 4 | Classic landscape | Most beauty, tea, chocolate and toy calendars |
| 24 | 4 x 6 | Portrait | Tall retail shelves and a narrower shipper |
| 24 | 8 x 3 | Wide panorama | A big front illustration, drawer styles |
| 25 | 5 x 5 | Square | Calendars that run through Christmas Day |
A 6 x 4 landscape grid is the usual starting point for 24 days. The front panel comes out close to poster proportions, which makes the illustration easier to compose. Portrait grids stand taller on a shelf but tip more easily once the lower rows have been emptied, so keep the heavy items low.
Work out the footprint
Height is the same sum using rows. The number of dividers is always one less than the number of cavities in that direction.
For planning, allow about 1/16 inch for each paperboard divider and about 1/8 inch for each outer wall of a rigid box. The real figures depend on the board and are fixed on the dieline, so treat the result as a close estimate and not a final dimension.
| Square cavity | 24 days, 6 x 4 grid, inches | Millimeters |
|---|---|---|
| 1.5 in | 9.56 x 6.44 | 243 x 164 |
| 2 in | 12.56 x 8.44 | 319 x 214 |
| 2.5 in | 15.56 x 10.44 | 395 x 265 |
| 3 in | 18.56 x 12.44 | 471 x 316 |
Half an inch on the cavity adds three inches to the width of a 24 day box. That is why moving the largest product to its own bigger door often shrinks the whole calendar more than any other change.
The same 2 inch cavity in other grids:
| Days and grid | Footprint, inches |
|---|---|
| 12 days, 4 x 3 | 8.44 x 6.38 |
| 12 days, 6 x 2 | 12.56 x 4.31 |
| 24 days, 6 x 4 | 12.56 x 8.44 |
| 24 days, 8 x 3 | 16.69 x 6.38 |
| 25 days, 5 x 5 | 10.50 x 10.50 |
Mixing cavity sizes
Uniform grids are the simplest to make and to fill. Mixed grids look better when the products vary a lot, and they waste less space. One rule keeps a mixed grid easy to manufacture: build every larger door from multiples of the single cavity. A double is exactly two singles plus the divider between them, so the divider lines still run straight across the box.
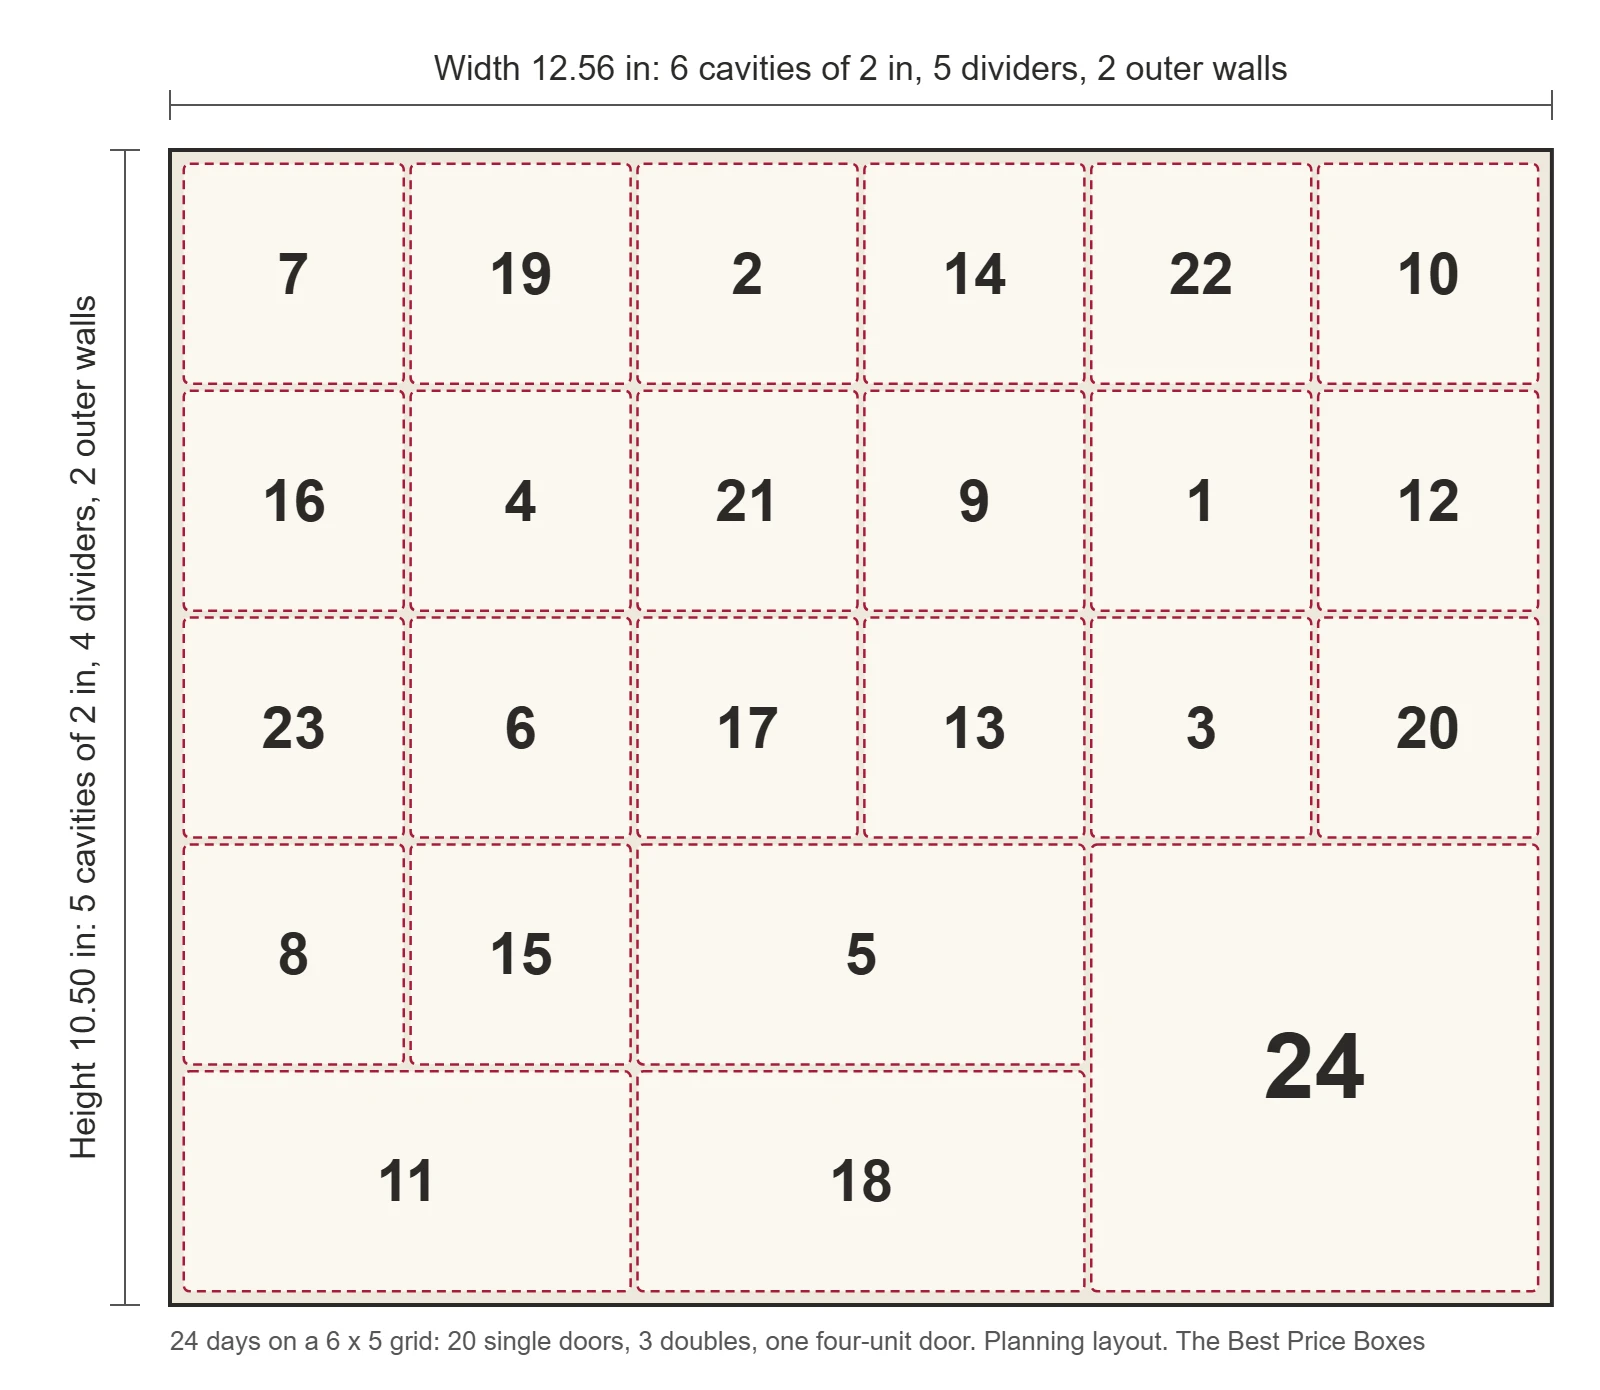
The layout above uses 30 units for 24 days. Put large doors at the bottom or in a corner. They hold the heaviest items, and a big opening in the middle of the panel weakens the front once it has been torn open.
Depth, and what to do with shallow items
Depth is the deepest product plus clearance, plus the front door panel and the back. One depth serves the whole box, so a lip balm ends up at the back of a cavity sized for a candle. A riser or false floor inside those cavities brings the item forward to the door. Tell us which days hold shallow products and the insert is drawn with the risers in place. The box inserts guide explains the insert materials.
Numbering and fill order
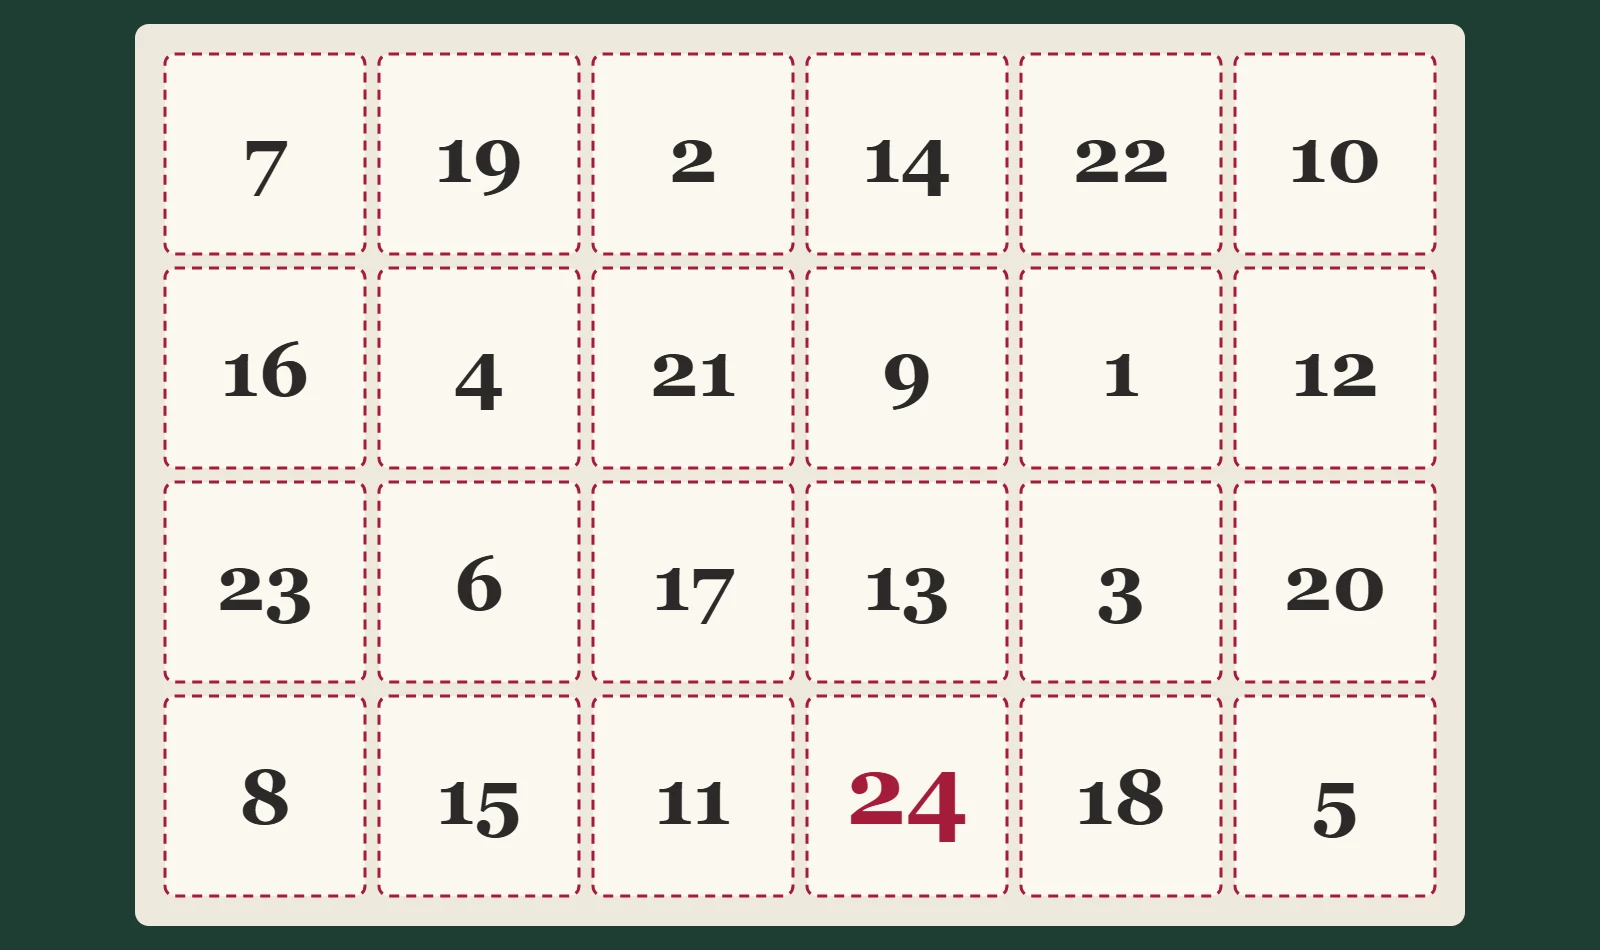
Scattered numbers make the daily hunt part of the fun. They also spread the opened doors across the panel, which helps the front keep its strength through the month. Settle the number map before artwork starts. The door numbers are printed on the front, and your packing team fills against the same map, so send a simple table of day, product and cavity with the brief.
How the structure changes the math
A punch-through door calendar has the smallest footprint, because the dividers are thin paperboard. A drawer calendar puts a rigid shell around every drawer, so allow closer to 1/8 inch between cavities and expect a larger, heavier box. A numbered tray of loose boxes needs finger room around each small box so it lifts out. The rigid boxes guide covers how the board and wrap are built.
Shipping a filled calendar
A filled calendar is dense, and the perforated door face is its weakest surface. Plan a corrugated shipper sized to the calendar, with protection across the front. Carriers price large parcels on size as well as weight, so the footprint you settle on affects postage on every unit. See corrugated board specifications for the shipper and how to measure a box for the order in which dimensions are written.
What to send for a quote
- Number of days and the grid you prefer
- The largest product as width x height x depth, plus any outliers that need their own door
- The structure: punch-through doors, drawers or a tray of numbered boxes
- Quantity and the date the calendars need to be on sale
- Whether they ship filled to customers or flat to your own packing line
A specialist replies within one business day. Design help and samples are free, shipping is free on every order, and there is no minimum order. Production takes 7 to 14 business days after you approve the proof. See how long custom boxes take to plan the full schedule.
Request a quote
Related: advent calendar box structures and finishes, Christmas gift boxes, subscription box packaging guide and the dieline template library.
Advent calendar box sizing questions
How big is a 24 day advent calendar box?
It depends on the largest product. With 2 inch square cavities in a 6 x 4 grid, the front of the box measures about 12.5 x 8.5 inches. With 3 inch cavities the same grid comes to about 18.5 x 12.5 inches. Depth is the deepest product plus clearance and the front and back panels.
Can the doors be different sizes?
Yes. Build larger doors from multiples of the single cavity so the divider lines still run straight across the box. A double door is two singles plus the divider between them. Large doors belong at the bottom or in a corner, where they carry the heavier items and leave the middle of the front panel strong.
Should I plan for 12, 24 or 25 days?
24 days is the traditional count, from December 1 to Christmas Eve. 25 days includes Christmas Day and makes a square 5 x 5 grid. 12 days suits higher value items, since each cavity can be larger without the box growing out of hand.
How deep should an advent calendar box be?
Take the deepest product in its retail pack, add about 1/8 inch of clearance, then allow for the front door panel and the back. One depth serves the whole box, so shallow items need a riser behind them to sit close to the door.
How early should I order advent calendar boxes?
Production takes 7 to 14 business days after you approve the proof. Add time before that for design, a sample and proofing, and time after it for delivery and for filling every cavity by hand. Most brands want finished calendars on sale well before December, so count back from that date.