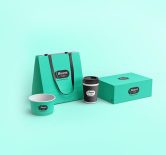
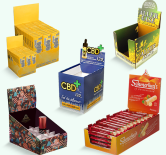

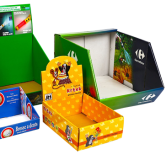
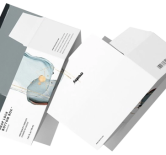
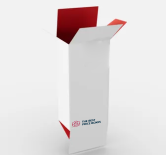
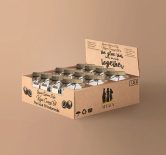
To get a custom box printed right, you send print-ready artwork built on the box’s dieline, which is a flat template that shows the cut, fold, and glue lines. Design it in CMYK, add at least 1/8 inch of bleed past every edge, keep logos and text a little inside the fold lines, outline your fonts, and export a high-resolution PDF. Do those five things and your box comes out looking exactly like your proof. Here is what each one means and the mistakes that cause a reprint.
See the layout before you start: the box dieline templates show the cut, crease, bleed and safe zone lines for each box structure, with stock sizes.
Start with the dieline
A dieline is the flat blueprint of your box, every cut, fold, and glue tab laid out in 2D. You design your artwork on top of it so the front panel, side panels, and lid all end up where they should once the box is folded. You do not have to make one. When you order, we send you the exact dieline for your box size and style, you design on it and send it back, and we know precisely how everything maps onto the finished box.
Bleed, trim, and the safe zone
Three lines on the dieline matter. The trim line is where the box gets cut. Bleed is artwork or background color pushed at least 1/8 inch past the trim line, because printing and cutting shift by tiny amounts and bleed keeps you from getting a thin white edge. The safe zone is 1/8 to 1/4 inch inside the trim and fold lines, so keep logos, text, and anything important inside it and nothing gets cut off or bent across a fold. Background can run out to the bleed, and the important stuff stays in the safe zone.
Color: design in CMYK, use Pantone for brand matching
Set your file to CMYK, not RGB. RGB is built for screens and shows colors a printer cannot physically hit, so RGB files shift when printed, usually duller than they looked on your monitor. If a specific brand color has to be exact on every run, ask about Pantone spot colors, which are pre-mixed to a standard so your blue is always the same blue. Pantone costs a little more than standard full color, but it takes the guesswork out of brand consistency.
Resolution, fonts, and file format
Raster images should be 300 dpi at final size. A logo pulled off a website is usually 72 dpi and will look fuzzy printed, so use vector art for logos and type where you can, since it stays sharp at any size. Outline or embed your fonts so they do not reflow on our end. Export a press-ready PDF, or send AI or EPS, keep the dieline on its own layer, and do not leave the dieline guide lines set to print. That is a clean, print-ready file.
The mistakes that cause reprints
The common ones are artwork left in RGB, which shifts color, low-resolution images that print fuzzy, no bleed that leaves white edges, text sitting on or too near a fold where it gets cut or creased, and files built at the wrong scale. A quick check against the dieline and the safe zone catches all of them before anything goes to press.
No artwork ready yet? We can help
You do not need a designer to order. If you have artwork, we will get it print-ready on the dieline for free and send a free 3D mockup so you can see the real box before it prints. If you are starting from just a logo, send it with your request and we will take it from there, with no minimum order, so even a small first run is worth doing right. For what a run costs, see how much custom boxes cost, then request a quote and we will send your dieline. Setting up a specific style? Our guides on mailer boxes, tuck-end boxes, and rigid boxes walk through the format details.
Custom box artwork FAQs
Ready to print your artwork? Order mailer boxes, rigid boxes, cardboard boxes, or any custom box with no minimum order at the best price.
What is a dieline?
A dieline is a flat 2D template of your box that shows where it gets cut, folded, and glued. You design your artwork on top of it so everything lands in the right place once the box is assembled. When you order, we send you the exact dieline for your box size and style, and you design on it and send it back.
What file format do you need for custom box printing?
A press-ready PDF is ideal, built on the dieline we provide. Vector files like AI or EPS are also great because they scale without losing quality. Keep the dieline on its own layer, outline or embed your fonts, and make sure images are high resolution. Avoid flattened low-res JPEGs or screenshots.
How much bleed do custom boxes need?
At least 1/8 inch of bleed past every trim edge. Bleed is background color or artwork extended beyond the cut line so that the tiny, normal shifts during printing and cutting never leave a white sliver on the edge of your box.
Should I design in CMYK or RGB?
Design in CMYK. RGB is for screens and looks brighter than what a printer can reproduce, so RGB files shift color when printed. Setting your document to CMYK from the start means the box looks like what you approved.
What is the difference between CMYK and Pantone printing?
CMYK, also called full color or process, mixes four inks and handles most designs and photos. Pantone uses pre-mixed spot inks for exact, consistent brand colors, which helps when a specific brand color has to match every run. Pantone usually costs a bit more but removes color guesswork.
Do I need my own designer, or can you help with artwork?
You do not need a designer. If you already have artwork, we will help get it print-ready on the dieline for free, and we provide a free 3D mockup so you can see the actual box before it prints. If you are starting with just a logo, send it over with your quote and we will work from there.
Related ordering guides
Before you design, make sure your box size is right by checking how to measure a box, and see how long custom boxes take to make so you order with time to spare.